Intro to Liveness Detection with React Native
What is Liveness Detection, why would you need it and how to build an implementation with Expo's FaceDetector.

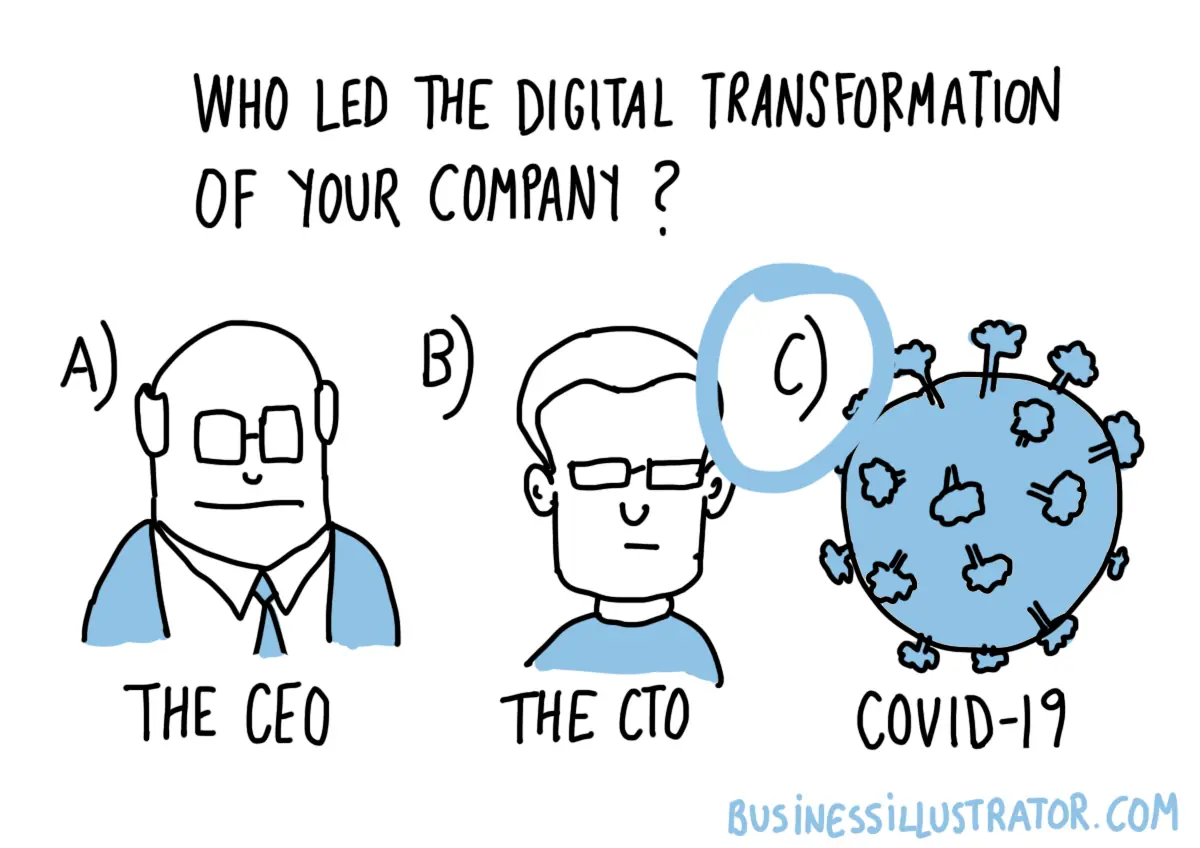
It's been over a year since the pandemic began and social distancing measures are still ongoing for good reason. Naturally, this has been quite the hardship for establishments that depend on the physical presence of customers. What it has also been is the leading factor pushing companies towards the adoption of a more digital operating model.
“Over the last few months, we’ve seen years-long digital transformation roadmaps compressed into days and weeks in order to adapt to the new normal as a result of COVID-19.” - Glenn Weinstein, CCO at Twilio
If a business has yet to digitalize their services, they're likely missing out on some revenue. However, different businesses have different concerns and as such, some may be quick to adapt while others remain wary. Financial institutions in particular are typically nervous about digital identity fraud.
Are You a Robot?
Most banks still require in person meetings to open an account. Few allow you to open one remotely, albeit with limitations on what it can do. The reason is risk. Your physical presence with documents up close is more trustworthy than an online application — where everything is easier to fake.
Enter eKYC (electronically know your customer). It's the category of techniques and approaches to digital identity verification. One of which, is Liveness Detection.
The Turing Test could be described as a challenge which determines if a machine could be mistaken as human for a specific mode of interactions. In contrast, Liveness Detection is a test to uncover a machine that is pretending to be human.
In 2019, Facebook terminated 5.4 billion fake accounts. Adding a liveness test to an onboarding process would certainly reduce spambots.
But how would it prevent digital identity fraud? Unfortunately, it does not. Not on its own. When it comes to digital identity verification, there is no silver bullet.
Rather, liveness detection can make it harder for someone to use your identity. It's usually not used alone and can be part of a larger verification process, typically in the onboarding stage. For a high level of confidence, it's very important that this process covers all bases. Liveness is one of them.
How would that online onboarding process look like? Besides the registration form, it could consist of a liveness test, facial verification and document authenticity checks. A user gets a score for each test, and their overall risk level can be calculated. That's the 'typical' eKYC procedure.
However, there are different methods to liveness detection and not all of them are useful against identity fraud. Each have their own strengths and weaknesses when it comes to security, accessibility and user experience.
A Familiar Challenge
CAPTCHAs are a method of liveness detection capable of deterring simple bots. They're quite common on the web and come in different forms: text-based, image-based or even a simple slider. Google's reCAPTCHA can be a single button click. Matter of fact, it works by tracking your browsing activity and assigning you a risk score. If you're a privacy-conscious user who clears all cookies, you're likely to be labled as high risk. The improved user experience comes at the cost of your own privacy.

We've all seen how impressive AI can be. But it's not only getting more impressive, but also accessible to learn and use. While that's great, it's not so great for CAPTCHAs which advanced AIs can easily subvert.
“CAPTCHA tests may persist in this world, too. Amazon received a patent in 2017 for a scheme involving optical illusions and logic puzzles humans have great difficulty in deciphering. Called Turing Test via failure, the only way to pass is to get the answer wrong.” - Why CAPTCHAs have gotten so difficult, The Verge
CAPTCHAs are intended for catching the average spambot. They are not capable of identifying advanced or tailor-made AI. In a process that aims to shield against digital identity fraud, they wouldn't be adequate. So what's the alternative?
Face-based Liveness Detection
Face CAPTCHAs are in fact, a thing. This liveness detection model boils down to requesting a selfie from the user, and applying image processing algorithms to determine whether it's an image of a real person.
To give you an idea of how such a process would work, I built a proof of concept app in React Native, which I will also guide you through creating. The goal here is an introductory level app. In fact, it's not extremely complicated to spoof this implementation as I will demonstrate in the app discussion.
Guide
I value your time so if you want to jump straight to source code, find it here. Feel free to skip ahead to the App Discussion section as well.
Getting Started
Expo makes it easy to prototype and share code for React Native. It's my go-to if I want to build something fast. I also really prefer TypeScript, so the code here is going to have types.
Create a new project using the blank TypeScript template and cd into it:
We're going to need the following Expo modules for working with the camera, face detection and view masking:
Additionally, we will use this view which abstracts away the circular progress animation:
Now we're ready.

User Interface
First comes the layout. The following pseudocode represents the final view hierarchy we're going to build:
We will make the camera preview and mask cover the entire screen using absolute fill. For the cutout shape, it depends on the styles for the mask element. We will use the following constant as a reference for its dimensions:
Basically, a square at the horizontal center of the screen with a small offset from the top.
minX refers to the left margin and minY to the top margin. So maxX would refer to minX plus the width. I borrowed this naming from native iOS development as it made the most sense.
Note that children to the camera component are drawn on top of the preview, and we want the circular progress to from a ring around the preview cutout. We will need to reference PREVIEW_RECT and PREVIEW_SIZE in several style objects.
That's about it for the initial UI. But we forgot one important task — we need to handle camera permissions:

Face Detector
Let's get down to business. The face detector module integrates with the camera module using props. It's quite straightforward to configure:
faceDetectorSettings can be configured to provide us with different detections based on need. There are many landmarks we could obtain such as the position of the mouth, nose and eyes. By analyzing these kind of points together, we can create the desired expressions and gestures.
Detection Criteria
Let's talk about onFacesDetected callback. This is where all the data processing is going to happen. In order to avoid issues with bad data, we will need to create some rules to make sure that the user is holding the device properly:
- There is only a single face in the detection results.
- The face is fully contained within the camera preview.
- The face is not as big as the camera preview (user is too close to the camera).
It would also be good to verify that the user is looking straight at the device as the fourth step, but I'll leave that for you to try.
In the callback, we're going to recieve results of different faces. This is the type signature for each face detection:
To check condition #2, we need to create a function to determine if one rectangle is within another. We can do that by checking if all corners of the inside rectangle (face) are within the outside one (preview cutout).

It's time to implement onFacesDetected. It will handle the detection criteria for now:
For checking whether the user's face is in the camera preview, you'll notice that we created an object faceRectSmaller. The reason is that the face detection rectangle we get is actually as big as the entire head:
Modeling State
Before we work on the rest of onFacesDetected, we need to come up with the possible states. Let's note down what the app should do. Describing the process in detail will help us come up with the state model:
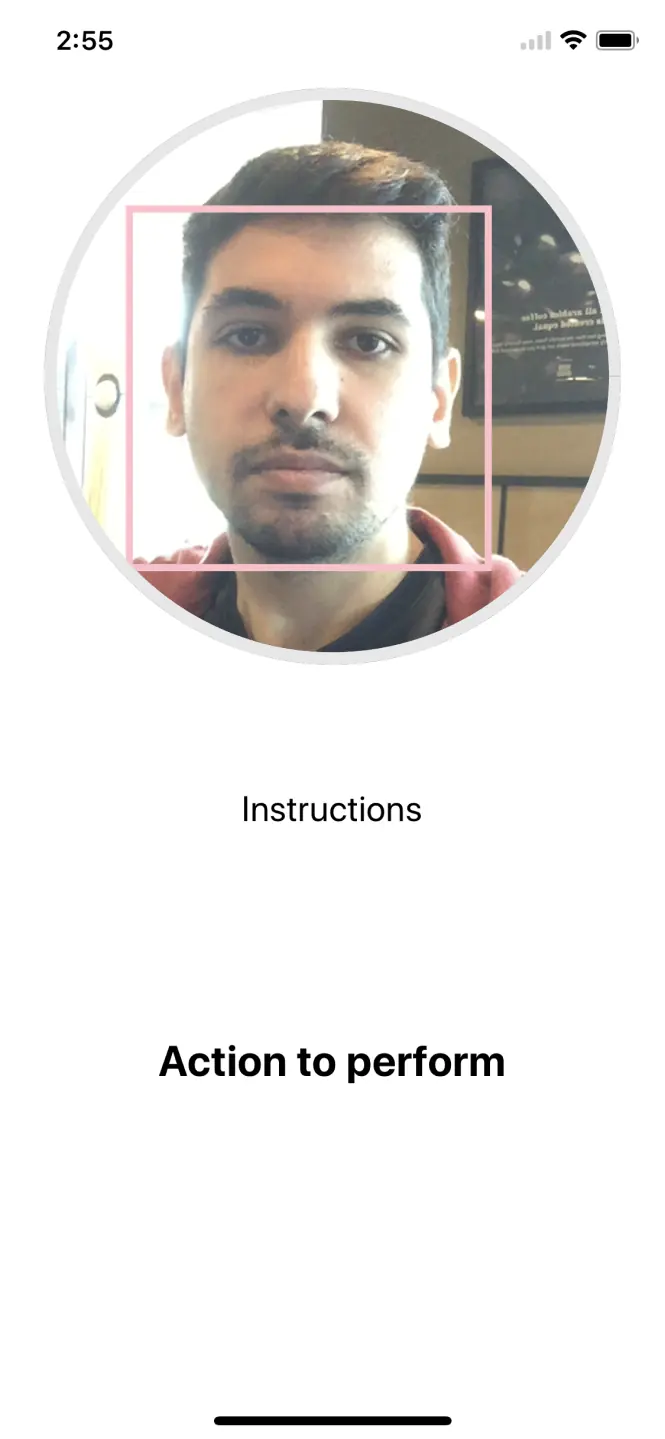
- User opens the liveness detector screen. They should see a prompt of what to do here.
- If there is more than a single face in the preview, we don't proceed.
- If the user's face is not in the preview at all, we let them know.
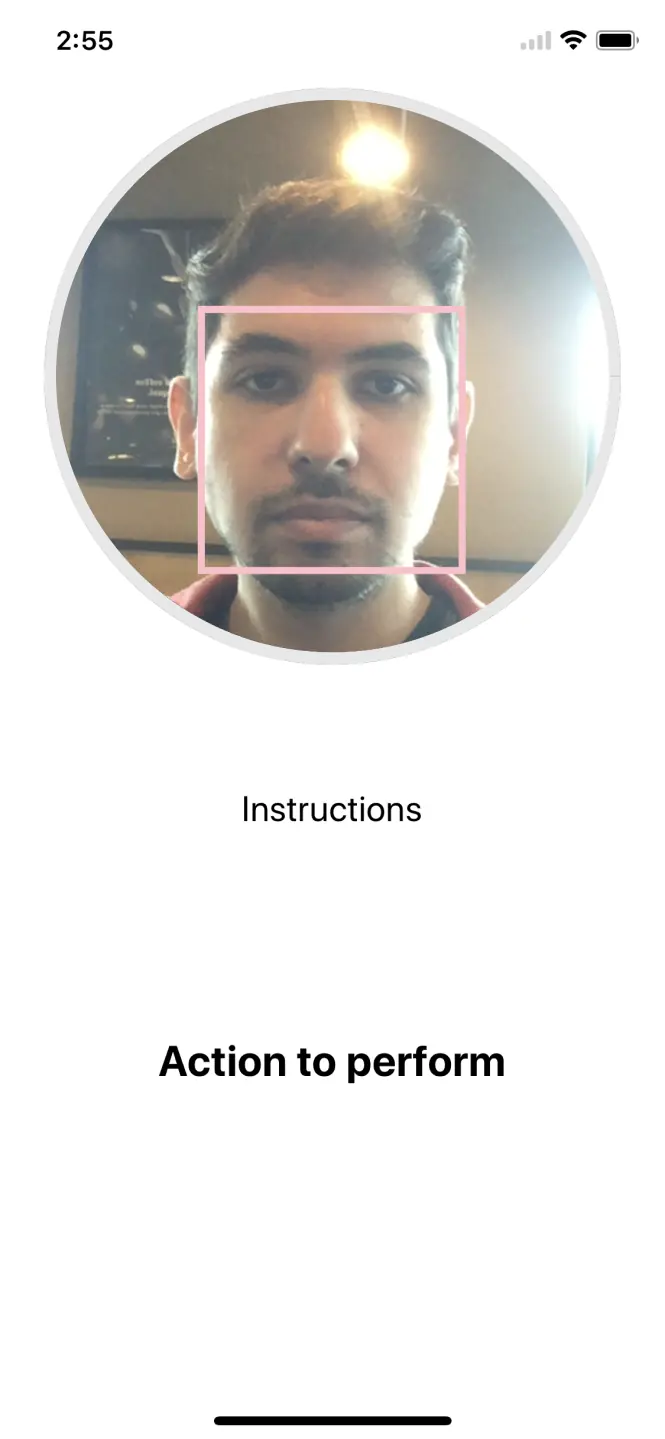
- If the user's face is in the preview but it's too close, we let them know.
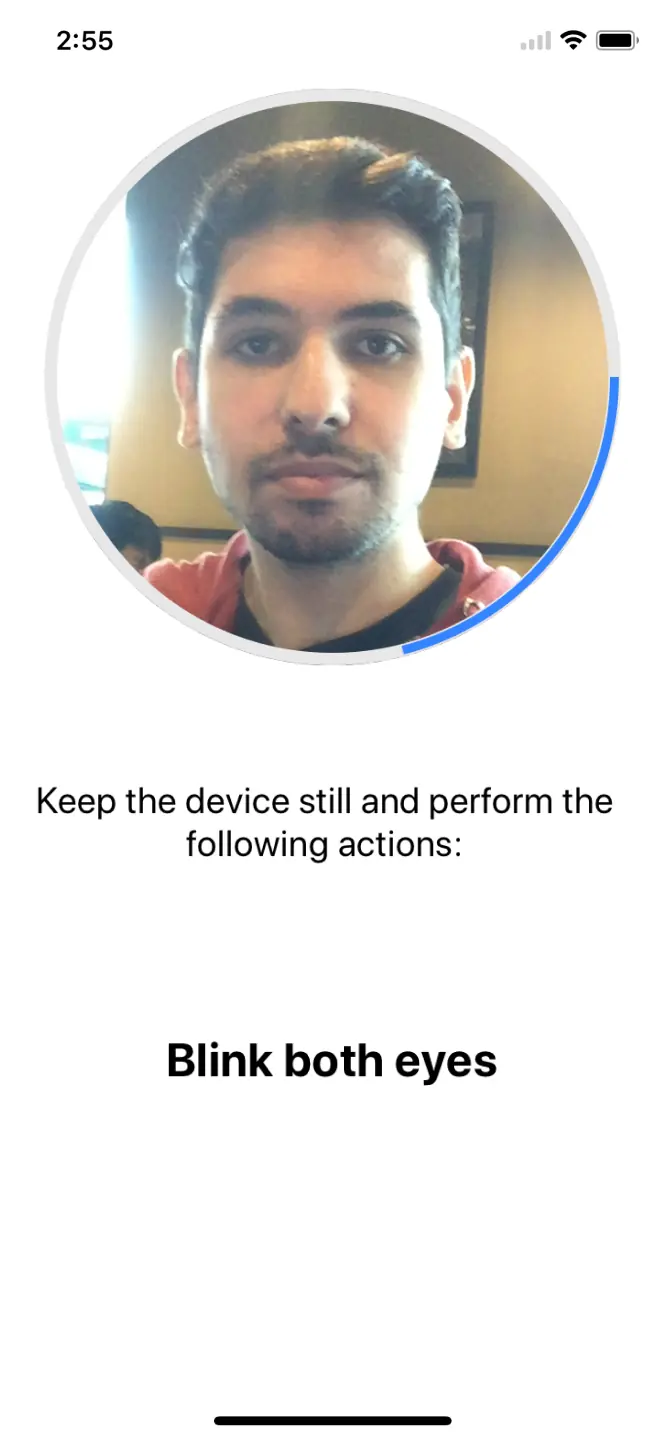
- We want to detect user actions. Those will be:
- Blinking both eyes.
- Turning head to the left.
- Turning head to the right.
- Nodding.
- Smiling.
- If the processing conditions are met, we prompt the user to perform an action from the above list.
- As the user completes actions, the circular progress fills.
- If the user's face leaves the preview after processing starts, we reset the process.
- If the user completes all the required actions in sequence, they pass.
Alright. Let's put the above into code. We can start by defining the prompt text to be shown before the processing starts:
We're also going to need a list of detections that must be performed. Each action has a threshold or a probability to compare against.
The way to determine the thresholds is through trial and error. If a threshold is met for an action in onFacesDetected callback, it means the user is performing that action.
We can track the current action to perform by declaring the actions as an array, which is easy to index and iterate through:
The final state model would be:
Since we have several pieces of state changing together, it's best to use React.useReducer:
We calculate the progress fill based on the number of successfully completed detections. We also consider the user placing their face in the preview correctly a successful detection, increasing progress fill (good job 🌟).
Once the user has gone through all detections in detectionsList the process will complete.
Our views remain static. The next step is to make them respond to state changes:
Let's come back to onFacesDetected. We need to update it so it reflects state by dispatching:
Once the user has their face in the preview they should now see a prompt to perform the first action!
Processing Gestures
With the state model done, we will now look into gesture processing. Since we know all the detection actions, a switch statement would be ideal. We will match the current action and check the corresponding thresholds. If the the threshold is met, the user passes and moves on to the next detection.
One tricky part here is related to the nodding gesture. We need to consider how people don't normally hold their phones perfectly level with their heads like robots. To mitigate this, we will need to normalize roll angle values. We can track the last few values with React.useRef and use their average as the current baseline angle.
Note that this will add a delay of minDetectionInterval * 10 before nodding detection can work. An alternative implementation would be preferred in a real app.
To track process completion, we can use an effect (😀). Since the circular progress animation has a default duration of 500ms, we need to consider the last animation before handling completion (e.g. navigating away to another screen).
You made it. The final source code is available here.
App Discussion
While there are many improvements that could be made, the main thing I would like to talk about is the robustness of the detector.
While this app is more difficult to spoof than a typical CAPTCHA, its processing pipeline is missing two important components:
- Distingushing 3D and 2D images (regular image vs. an image of another image).
- Image manipulation detection. E.g. deepfakes.
Exploiting the first weakness:
With a high enough resolution screen the process can be spoofed. In the video above, I'm recording myself from a different device and playing the recording on a screen in real time.
Being able to complete the process through a screen is a big no-no. This is the case of detecting a face on an image of another image (the image on the recording device and the image on the screen). Since this succeeded, it wouldn't be hard to spoof with a deepfake as well.
The implementation we have here is only but a single method of liveness detection: movement. There are detectors out there that do address these issues but in turn suffer from others. To distinguish 2D/3D and manipulated images, some detectors train a model on a dataset of authentic and spoofed images. Others analyze image features to infer properties such as depth.
Each approach to face-based liveness detection has its own pros and cons. For example, a model trained to detect spoofed images may require little user collaboration but the model is only as good as its training set. To reduce edge cases, combining techniques is the way to go.
Think of how it would be if we enhanced this detector with the missing features. They could work in the background without any extra input required from the user. Although this would require novel work on our part instead of relying completely on a single library. Maybe for a future tutorial, I could explore that angle as I've never had a better excuse to try TensorFlow.js for React Native.
Conclusion
While the pandemic makes the benefits of going fully digital very apparent, onboarding new users online introduces the risk of digital identity fraud. To mitigate this risk, a digital identity verification procedure must be implemented. Liveness detection is typically part of that procedure. However, while text and image CAPTCHAs are typically used there, face-based liveness detection is a better alternative. Face-based liveness detection makes it harder for someone to use your photo when registering. In spite of that, measures must be taken to ensure that the approach implemented is adequately robust. This can be achieved by combining several liveness detectors into one, as a different approach may work where another fails.
I hope you found this post useful and informative. Have a great day.